Saturday, June 30, 2012

Flip Clips Books

So this week I was assigned the job to design Flip Clips covers!

These covers were 10 x 10 inches that will be dicut (creating holes) that will display the flip books inside.
I designed a total of 2 covers for two individual companies (Nickelodeon and Hasbro) and this was presented to Simon & Schuster on Tuesday.


This is my sketch for The My Little Pony Flip Clips. I deiced to use one of the background designs for a spread from the My Little Pony Wedding in Canterlot. Here I drew onto of the image, I decied to crop off most of the ground making the main focus to be the sky.

Layout Breakdown:
After doing a ton of research on the project I think its safe to say that I understand the concept of My Little Pony.  (Left side is my sketch darkened)
Since my main focus was to be on the sky I wanted the ponies to really pop against the blue. In my layout I deiced to have all the ponies placed against one another on the left side of the cover.

In the top corner I chose to have the flying ponies near the clouds and then the others surrounding the dicuts, all facing inward. On the right side of the page is the created clouds (using the pen tool in Adobe illustrator and building a mask to cover the rest of the art). Inside each cloud I took a scene from the movies or the ebooks and filled the clouds (Hasbro has the final say which scenes we get to use). At the top center page I took the My Little Pony logo from our Style guide and placed it in the center of the page. I also thought of typography and decided to go with the font called Hopeless Heart (the blue sticky note). This font is mainly used for interior spreads and back covers.


There is the original 6: (From Left to right) Pinkie Pie, Rainbow Blast,Rarity, Twilight, Applejacks, and Fluttershy.


Monday Cover Reviews:
 Cover review is a large meeting that consists of all the graphic designers,art directors, and creative directors, and marketing team. Here it is just like Herring's class critiques!!! Which was very cool! I pitched my covers and literally wrote on my artwork and took in their advise. Not only did I learn how to think of the cover from an artistic perspective but also financially.

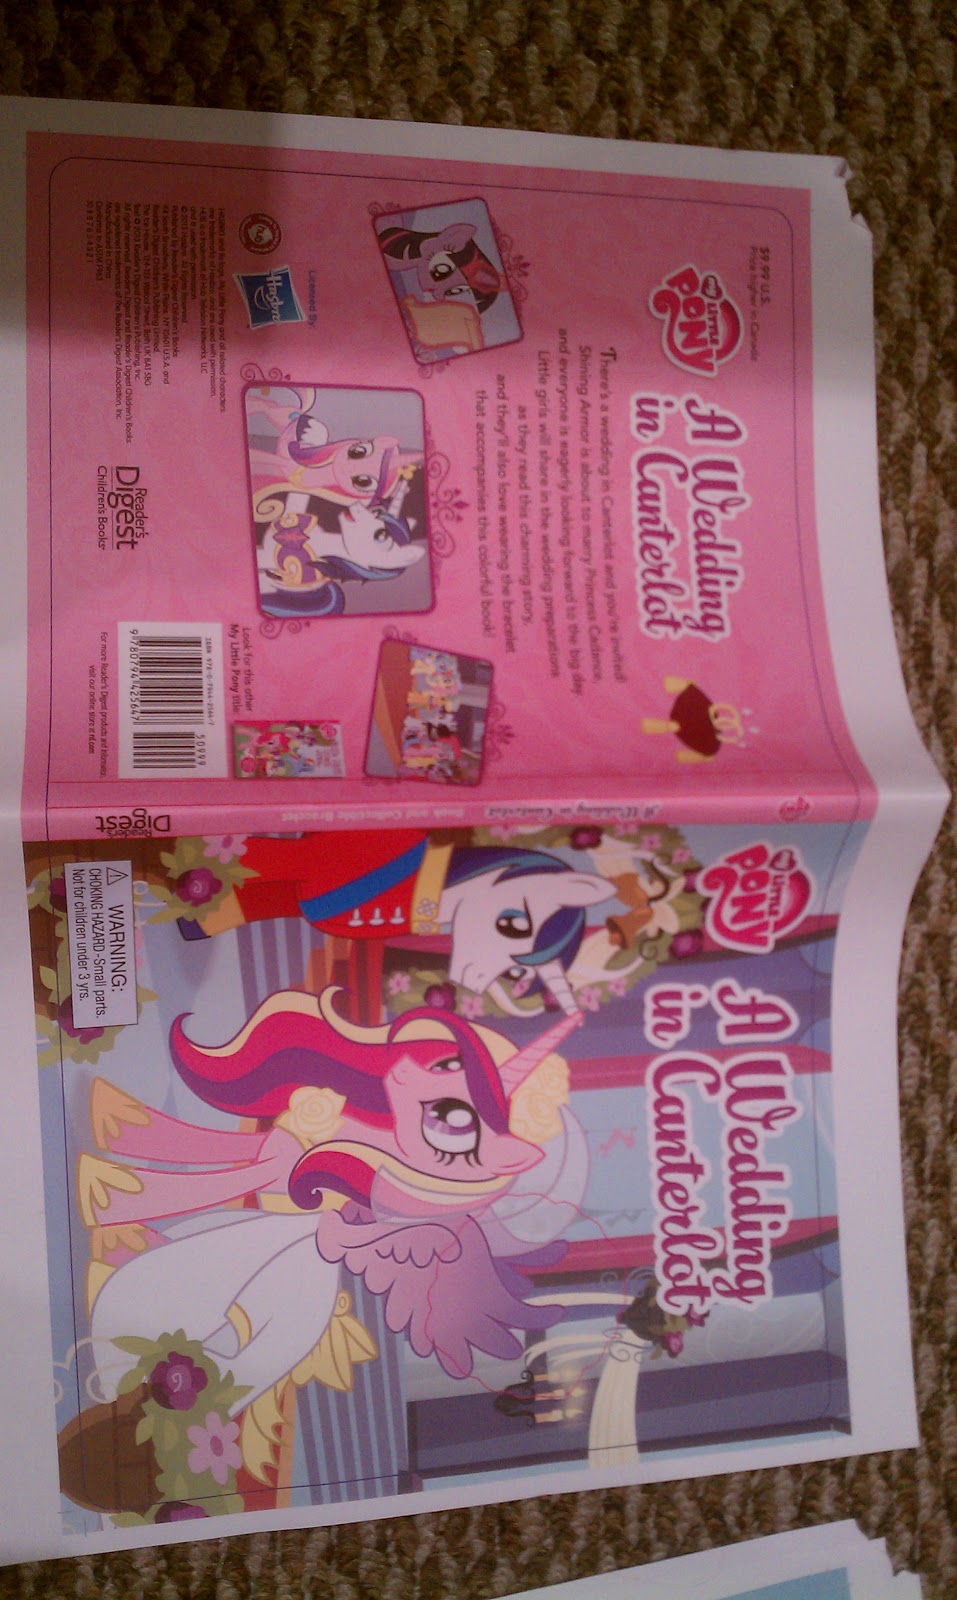
On the left is a finalized design of The MLP Flip Clips book. Here this project was presented to Simon & Schuster and Hasbro on Tuesday.


Layout Breakdown:
The second cover I designed was for Spongebob Squarepants! Here I took the same layout design from the My Little Pony Flip Clip. From a marketing persepective if we harness the same elements of the cover we can apply it to several differnt clients. EX: The Avengers, Dora the Explorer, Seasame Street, Barbie, Hello Kitty...etc.

On the right is my sketch for Spongebob. I put a sheet of tracing paper and placed it over another cover created by our lead cartoonist and senior design David.

This book cover is going to be 10 x 10 inches. In the top left hand corner I will place the Nickelodeon logo and also the Spongebob Squarepants logo.

Along the left side of the page will be Spongebob, Patrick, and Plankton. On the right side of the page will be the dicuts of fun water blurbs( here I designed the blurbs in Adobe Illustrator with the pen tool and masked the rest of the remaining art).

During Cover review on Monday we as a team decided to change up the bottom line tagline of the book. Originally it was 6 Spongebob Stories, but now it is 6 Spongy Stories!

Cover 1 Editing:
Here is my first design. After receiving advise from my art directors I had to go back and revise several things to the cover.

Things to Edit Part 1:
Find a new image of plankton
Edit the flip pages in the lower corner by having the orange wrap fully around it.


Cover 2 Editing:


Here is the notes from my second visit. Together we discussed what needed to be fixed and what would really make this cover pop!

Things to Edit Part 2:
Flip Plankton
Mask Arm
Brighten background with a higher % of Cyan
Flip Stroke colors green and purple
Fix pages and curve stroke.


Cover Editing Part 3:
Here I followed the instructions but added a few new elements of my own. 

New Additions:
So I decied to remove Plankton entirely, because without Patrick or any other side characters it seemed rather odd. Secondly I decieded to add a Cyan blue line with Spongebob stepping over it. As for Spongebob's arm if everyhing goes well with Nickolodeon they will assign an artist to draw in a new arm (so it looks like Sbob is holding up the dicut purple blurb). And Example of what we are thinking of is on the image above. Next to my doodle Skeleton.

Friday, June 22, 2012

Count with Elmo Covers

 So for this week I was assigned to design three Sesame Street book covers for a book called Count with Elmo. This will be a book that will teach children to count from 1- 20. Here is my original sketches for my covers. The measurement for the book is 10 x 10 inches.


 Idea 1: This was my first idea. I was researching and studying the shapes and patterns of numbers. EX: 3, 0, 2,8,6, and 9. Most of them being a round or curvy shape wanted to incorporate the same style throughout the book, especially the cover. I deiced to use circles because I considered them to be fun,welcoming, and overall exciting  for children. The first design of this cover is in the bright Elmo red. My art director suggested we try blue as well.

Idea 2: I thought a great way to design a counting book is to have children count colorful fun objects. The cover has 3 recognizable characters: Cookie monster, Zoey, and Elmo. Here I have them running through a park flying kites. I chose a lot of blue in this cover because it was very soothing and easy going. This cover was meant to be image heavy, which is why I put the title under the logo in the top left corner.

Idea 3: This is the third cover which had a lot of the same elements as my second idea. However instead of counting objects I wanted the child to count the numbers on the page but have a miniature Elmo next to the number. Here he is performing tasks/ posing next the the giant number.EX: 1 he is running with a single kite, 2 he is surrounded by 2 presents, and in 3 he is trying to catch several butterflies. Out of all three of my ideas this one I deiced to be very simplistic (and let Elmo and the Numbers do all the talking).


EDITOR'S CHOICE:
Later on I was in a meeting and there I discussed all three of my ideas my editors,creative directors, and art directors. We have narrowed down my ideas into two to present to Sesame Street representatives for next week on Tuesday.

On the right are corrections and notes. The final image is the cover we decided to go with.


 Here is the second idea. We decided to go with my Idea 3, but re formatted the cover. We chose to stick with the simple cover and lose the miniature Elmos and Elmo's signature. The font I went with was called Tykewriter, this font is very child-like. I also suggested to make the two transparent. Also Elmo and the number 1 will be dicut and lift.

The rest of the images are the differnt styles and colors tests.

This is the final cover we will present on Tuesday. Here the number 1 is a bright yellow that contrasts with the royal blue. Also I make the number 3 red because I felt like it had a "sandwich" effect and created an easy pattern. The number two is a transparent green, it's opacity is at 60%.

Friday, June 15, 2012

Wedding in Canterlot Projects


The First 3 pages are the images I used to design the My Little Pony Flipbook. It is an 85 image flipbook so I decided to show only some of the images. 


This is the Wedding in Canterlot book that will be coming to stores in August. I designed the layout of the book and added several elements to the pages. With the help of my art director we went over each spread design and figured out what to pull out from the movie that would be recognizable to the viewers,but still maintained it's fun elements. I had to design the structure and color pallet for each page. I also helped design the book in Ebook/ Nook format. It was a lot of fun! 


Wednesday, June 13, 2012

Moshi Monster Book

Yesterday I completed the My Little Pony Flipbook. It is a book that contains 85 color pages on a sheen card stock. Example on left. I will up load an image of the finished book. This morning at 10:00am we have a staff meeting to talk about new cliental and what's coming up for July.  Also yesterday around 1:00pm all the interns are assigned a new project.

I heart drawing Moshi Monster Book:
Will be a drawing book teaching kids how to draw Moshi Monsters.

Research: 
Moshi Monsters was created by a company called Mind candy. It is very popular in North America and England. The age demographic is 5-9 and can best be found at Claire's or Iceing stores in shopping malls.  

Assignment: 
To fill 48 pages of the Moshi Monster Book. 2 pages will include stickers. 
At 11:00am we will collect all our ideas and brainstorm as a group. Then we will be assigned individual pages to work on. 

More information coming soon....

Monday, June 11, 2012

My Little Pony Flipbook Project

Today was my first day working at Reader's Digest! It was a very busy Monday.

My first assignment was working on the My Little Pony Friendship is Magic Royal Wedding.

The Assignment was to design a flip book to go along with the My Little Pony children books. Using the DVD I captured several screencaps and transfered the files over to Adobe Indesign. The Measurements were width was 5 1/2 inches and height was 2 1/2 inches. Then we had to print 22 pages in color and in high resolution. After the printing we bounded the flip book. I turned it into my boss along with several art directors and I should get feedback and then edit, revise, and print.

The scene I decied to go with the big kiss at the end of the wedding. It was very cute and had the best shots. in the beginning of the scene the new husband and wife just leave the alter and wave to all the other little ponies. They kiss on the balcony. I plan to add on several more pages to this project, my goal is atleast 35 by the end of this week.


Thursday, June 7, 2012

First Post!

SO I just got an internship for Reader's Digest in NY! My internship begins on June 11, 2012. I am very excited. This job is a wonderful opportunity. I will be working for two different departments. The first one is in the Advertising/Marketing department for books and ebooks (which deals with Barnes and Noble, Amazon, and Apple). The other is working in the Graphic Design and Art department. I will be working with a creative team of designers to help design the layouts, typography, and content of children's books. This blog will mainly be based on the latter department.